Saturday, May 31, 2008

Eclairs

In conjunction with the TWD selection of Sticky Honey Buns, I had all the best intentions of making Raisin Snails with the remaining brioche dough. I even made a vanilla pastry cream the day before as I was proofing the dough. I thought to myself --- for once , I wasn’t running around like a lunatic trying to pull a recipe together at the last minute (I know you can relate to this!). Being planned and organized isn’t in my DNA, so of course I shelved the snail recipe at the last minute. So, what should I do with the delicious pastry cream that is sitting in the frig…ECLAIRS!


Eclairs are such a special treat, and they are surprisingly easy to make. The trick is getting down the technique for choux paste. The dough is unique as you cook it twice: on the stove then in the oven.


This dough never fails to amaze me, as a pretty simple dough balloons into a beautiful puff pastry. This dough can also be savory, with the addition of cheese and herbs, to make delicious gougeres.

Twice Baked Chocolate Cake (aka Choc Cake Bread Pudding)

Earlier this month, I had a disappointing experience with a chocolate cake recipe, resulting with a VERY DRY cake. I really hate throwing away food, especially in this case as the cake was made with really good chocolate/cocoa powder and other high quality ingredients. So, this poor forlorn cake sat in the kitchen over a week, as I contemplated its future. What to do --- make a trifle, layer it in a parfait? --- then it dawned on me…BREAD PUDDING!!!! I took my go-to bread pudding recipe, substituted the bread with the cake, and eliminated the sugar in the custard base. Here is the original recipe for Bread Pudding, with my adjustments in parentheses:

Bread Pudding

Ingredients

½ loaf stale challah or French bread (6 C. stale/dry chocolate cake cut into cubes)

1 C milk

2 C heavy cream

3 eggs

¾ C sugar (excluded)

¼ tsp cinnamon (increased to ½ tsp)

1 tsp orange zest (excluded)

1 tbsp vanilla extract

½ C raisins (excluded)

½ C chopped pecans (substituted ½ C choc chips)


Instructions

Preheat oven to 325 degrees. Butter a baking dish.


In a large bowl, beat together milk, cream, eggs, sugar, cinnamon, orange zest and vanilla. Add cubed bread and stir to combine. Add raisins and pecans and stir to combine. Pour mixture into prepared pan. (As the cake is more fragile than bread, I first placed the cake cubes and choc chips in the baking dish, combined the remaining ingredients, and poured the custard mixture over the cake cubes.)


Bake until browned and custard is set, approximately 1 hour.


The verdict ---I was absolutely surprised that this could pass for a respectable dessert! You really don’t see the layers of cake as you would with a bread pudding, but it does remind me of a flourless chocolate cake or a fallen soufflĂ© cake. Thanks to my fellow foodies at chowhound for helping me brainstorm through this problem!


Tuesday, May 27, 2008

Brioche

In my prior TWD post for Pecan Honey Sticky Buns, I mentioned a different technique for making brioche dough, which I will share here. I recently completed a terrific 10 week pro-baking course at a local cooking school, New School of Cooking. I was thrilled to find out that we would be learning how to make brioche during one of the weeks. As we started assembling our ingredients and brought out the kitchen aid mixers, I was very surprised to see that we would be using the PADDLE attachment instead of the dough hook to mix the dough. I really like this technique as it doesn't force my poor hardworking kitchen aid mixer into overdrive! Here are the quick instructions to making the dough (any recipe can be used, but the basic technique is the same):

- combine warm water/milk and yeast, and allow for yeast to dissolve
- add dry ingredients (flour, sugar, salt) and mix to combine
- 0nce the mixture starts looking lumpy, add eggs one at a time. Once all eggs are added, turn mixer up to low/medium and mix for approx 5 minutes. The purpose of this is to extract all the gluten out of the flour. Contrary to what I've read in cookbooks, we were told to mix at a lower speed as you don't want to aerate the dough. At the end of this mixing time, you want to see 1/2 of the mixture sticking to the sides of the bowl and the other 1/2 sticking to the paddle. You should see "strings" of dough stretching from the paddle to the side of the bowl. If the dough still clumps in the middle, add a little water to loosen.
- turn the mixer to low and add the butter to incorporate (takes me 2-3 minutes). Not overmixing is emphasized here, as overmixing will warm up the butter. - at this point, the dough should be very soft, but hold together with noticable elasticity
- proofing and baking instructions are similar to that in Dorie Greenspan's recipe.


Ideally, the brioche crumb should look tight and dense, like pound cake. As you can see here with all of the little air pockets and lack of a tight crumb, I was not successful in my handiwork this weekend. Still, trust me, as this technique has worked almost everytime for me.


Regardless of technique, the taste of the final product was delicious. Thank you Dorie for another wonderful recipe!

Pecan Honey Sticky Buns (TWD)

This week's Tuesdays With Dorie selection comes courtesy from Madam Chow at Madam Chow's Kitchen. There is nothing more seductive than a sweet, sticky honey glaze dripping over circles buttery brioche dough. To prepare for this recipe, I had to acknowledge and accept that I will be using almost a POUND of butter! (two seconds pass...tick, tick) Okay, I'm over it... on to the preparation. Aside from the dough technique, I didn't deviate from the original recipe.


The trickiest part of this delicious recipe was the preparation of the brioche dough.
I took a different approach to making brioche dough, and this came courtesy from a pro-baking course I took at my local cooking school. I used the PADDLE attachment, only mixed at a medium speed for only 5 minutes to develop the gluten, and added the butter at the very end mixing at a low/medium speed for 2-3 minutes (until fully incorporated). The resulting dough was soft and pliable, and it didn't require overworking my KA. I will provide more info on this technique in a future post with my brioche pictures.


I am always amazed at how yeast transforms flour, sugar and butter into these puffy gems. I baked only a portion of the rolls, so used a small loaf pan as my baking dish. Even before going in the oven, these babies look scrumptious..


The verdict on this recipe --- absolutely delicious!

I going to stop writing (as I'm getting the luscious honey glaze all over my keyboard) and let the pictures speak for themselves....


If you can't get enough of these gorgeous buns, check out the delicious creations made by my fellow bakers at Tuesdays With Dorie.

Pecan Honey Sticky Buns
Adapted From Baking From My Home to Yours, by Dorie Greenspan
Makes 15 buns

Ingredients:
1/2 batch for Golden Brioche Dough (recipe below)

For the Glaze:
1 cup (packed) light brown sugar
1 stick (8 tablespoons) unsalted butter, cut into 4 pieces
1/4 cup honey
1-1/2 cups pecans (whole or pieces)

For the Filling:
1/4 cup sugar
3 tablespoons (packed) light brown sugar
1 tablespoon ground cinnamon
3 tablespoons unsalted butter, at room temperature

Instructions:
Generously butter a 9-x-13-inch baking pan (a Pyrex pan is perfect for this).

To make the glaze: In a heavy-bottomed saucepan, bring the brown sugar, butter, and honey to a boil over medium-low heat, stirring frequently to dissovle the sugar. Pour the glaze into the buttered pan, evening it out asbest you can by tilting the pan or spreading the glaze with a heatproof spatula. Sprinkle over the pecans.

To make the filling: Mix the sugars and cinnamon together in a bowl. If necessary, in another
bowl, work the butter with a spatula until it is soft, smooth and spreadable.

To shape the buns: On a flour-dusted work surface, roll the chilled brioche dough into a 16-inch square. Using your fingers or a pastry brush, spread the softened butter over the dough. Sprinkle the dough with the cinnamon sugar, leaving a 1-inch strip bare on the side farthest from you. Starting with the side nearest you, roll the dough into a cylinder, keeping the roll as tight as you can. (At this point, you can wrap the dough airtight and freeze it for up to 2 months . . . . Or, if you want to make just part of the recipe now, you can use as much of the dough as you'd like and freeze the remainder. Reduce the glaze recipe accordingly).
With a chef's knife, using a gentle sawing motion, trim just a tiny bit from the ends of the roll if they're very ragged or not well filled, then cut the log into 1-inch thick buns. (Because you trim the ragged ends of the dough, and you may have lost a little length in the rolling, you will get 15 buns, not 16.) Fit the buns into the pan cut side down, leaving some space between them. Lightly cover the pan with a piece of wax paper and set the pan in a warm place until the buns ahve doubled in volume, about 1 hour and 45 minutes. The buns are properly risen when they are puffy, soft, doubled and, in all likelihood, touching one another.

Getting ready to bake: When the buns have almost fully risen , center a rack in the oven and preheat the oven to 375 degrees F. Remove the sheet of wax paper and put the pan on a baking sheet lined with parchment or a silicone mat. Bake the sticky buns for about 30 minutes, or until they are puffed and gorgeously golden; the glaze will be bubbling away merrily. Pull the pan from the oven.


The sticky buns must be unmolded minutes after they come out of the oven. If you do not have a rimmed platter large enough to hold them, use a baking sheet lined with a silicone mate or buttered foil. Be careful - the glaze is super-hot and super-sticky.
~~~~~~~~~~~~~~~~~~~~~~~~~~~~~~~~~~~~~~~

Golden Brioche Dough


Ingredients:
2 packets active dry yeast (each packet of yeast contains approx. 2 1/4 teaspoons)
1/3 cup just-warm-to-the-touch water
1/3 cup just-warm-to-the-touch whole milk
3 1/3 cups all-purpose flour
2 teaspoons salt
3 large eggs, at room temperature
1/4 cup sugar 3 sticks (12 ounces) unsalted butter, at room temperature but still slightly firm.

To Make The Brioche: Put the yeast, water and milk in the bowl of a stand mixer and, using a wooden spoon, stir until the yeast is dissolved. Add the flour and salt, and fit into the mixer with the dough hook, if you have one. Toss a kitchen towel over the mixer, covering the bowl as completely as you can-- this will help keep you, the counter and your kitchen floor from being showered in flour. Turn the mixer on and off a few short pulses, just to dampen the flour (yes, you can peek to see how you're doing), then remove the towel, increase the mixer speed to medium-low and mix for a minute or two, just until the flour is moistened. At this point, you'll have a fairly dry, shaggy mess.Scrape the sides and bottom of the bowl with a rubber spatula, set the mixer to low and add the eggs, followed by the sugar. Increase the mixer speed to medium and beat for about 3 minutes, until the dough forms a ball. Reduce the speed to low and add the butter in 2-tablespoon-size chunks, beating until each piece is almost incorporated before adding the next. You'll have a dough that is very soft, almost like batter. Increase the speed to medium-high and continue to beat until the dough pulls away from the sides of the bowl, about 10 minutes.Transfer the dough to a clean bowl (or wash out the mixer bowl and use it), cover with plastic wrap and leave at room temperature until nearly doubled in size, 40 to 60 minutes, depending upon the warmth of your room.Deflate the dough by lifting it up around the edges and letting it fall with a slap to the bowl. Cover the bowl with the plastic wrap and put it in the refrigerator. Slap the dough down in the bowl every 30 minutes until it stops rising, about 2 hours, then leave the uncovered dough in the refrigerator to chill overnight. (After this, you can proceed with the recipe to make the brioche loaves, or make the sticky buns instead, or freeze all or part of the dough for later use.)


Monday, May 26, 2008

Cocoa Buttermilk Cake

I've have little desire to get out this Memorial Day weekend. Los Angeles has had unseasonal weather, with overcast skies and rain, and it has really put a damper on my weekend plans. I guess I'm one of those people that get affected by weather --- I really need sunshine to maintain a happy disposition!

Baking is alway a theraputic mood lifter for me, so I decided to baking something.

Browsing my cookbooks, I stumbled upon this recipe for Cocoa-Buttermilk Birthday Cake, from Baking My Home to Yours by Dorie Greenspan.

I was pleased to read the ingredient list and find everything on hand in my pantry.

There are a bazillion varieties of chocolate cake recipes out there, and of course every recipe claims to be the best. My criteria for an excellent cake include an intensely deep chocolate flavor, a dialed-down sweetness, and a tender crumb.

After trying numerous recipes (and paying the price with countless extra hours at the gym), I've identified my two reliable and delicious go-to recipes: Double Chocolate Layer Cake (from Engine Co 28) and Chocolate Stout Cake. Both recipes can be found on Epicurious.com.


The verdict for this receipe? Although I liked the addition of malted milk powder to the frosting, I wasn't wow'ed by the cake flavor (the intensity of chocolate wasn't there) .

Sorry Dorie, but I 'm going to stick with my reliable favorites.

Tuesday, May 20, 2008

Traditional Madeleines (TWD)

I was delighted to find out that Tara from Smells Like Home selected Traditional Madeleines for Tuesdays With Dorie!

What is Madeleine --- is it a cake or a cookie? Well, I think they are a little of both. Essentially, Madeleines are made from a genoise cake batter, and baked in scallop-shaped molds to provide the lovely shape.


Even though I use non-stick, I always generously butter and flour the pan. To fill the madeleine molds, I use a piping bag, which keeps everything neat. If piping bags aren't available, ziplock bags also work perfectly.


I've repeatedly used a recipe from Baking with Julia, which calls for a traditional genoise cake batter. When comparing the two recipes, I noted that this version slightly varies:
- More butter and less eggs - who is to complain about more buttery goodness!
- Refrigeration time - this recipe calls for the batter to set in the frig for 3+ hours. I refrigerated the batter for only 3 hours.
- Leavening - traditional genoise is tricky, as it relies solely on eggs to give the cookie lift, and this recipe calls for a little baking powder.


This pan just came right out of the oven. Those humps are a good sign! I love baking these treats until the edges are a darker brown... the crispy buttery edges are my favorite part...yum! These cookies can be dipped in chocolate, but I like them either plain or with a dusting of powdered sugar.


a href="http://farm3.static.flickr.com/2388/2500399153_8e04b68ee1_b.jpg" href="http://farm4.static.flickr.com/3159/2501231850_96e417620a_b.jpg">

Overall, this recipe was very easy and fast to pull together and made just the right amount of cookies - 1 dozen using the large madeleine pan.

After my effort this afternoon, here is the best part...enjoying my treat!

I really enjoyed the buttery flavor and the cakey texture of this madeleine ...delicious!

To see what else is cookin' this week, check out the blogroll at TWD...

Tuesday, May 13, 2008

Florida Pie (TWD)

I've been looking forward all week to get my hands on this week's Tuesday's With Dorie recipe, Florida Pie, which was selected by Diane at Dianne's Dishes. I've never tasted key lime pie, so this will be a first for me!

Although Dorie mentions the use of a ready made crust, I couldn't resist making a graham cracker crust (which came together in minutes, thanks to my trusty food processor).


The modifications made to the original recipe were:
- futher grinding down the coconut in the food processor, which gave the coconut layer a thick, creamy texture.
- omitting the coconut in the meringue
Also, freezing was an essential step for me, as it helps the custard hold it's shape, as cut slices.

I did overbeat the meringue, so the quick fix was to pipe it to hide the mistake!


Overall, I like the combination of key lime and coconut, but these great flavors were overwhelmed by a cloying sweetness coming from the sweetened condensed milk (I used the Nestle brand, perhaps another brand would make a difference?).

I plan on experimenting with the recipe (i.e. replacing the sweetened condensed milk with a homemade custard) to dial down the sweetness. Also, will try topping this with whipped cream instead of the meringue.


If you want to see more, check out the gorgeous creations of my fellow baking bloggers at Tuesday's With Dorie!


Florida Pie
Baking From My Home To Yours - By Dorie Greenspan

Ingredients:
1 9-inch graham cracker crust, fully baked and cooled, or a store-bought crust
1 1/3 cups heavy cream
1 1/2 cups shredded sweetened coconut
4 large eggs, seperated
1 14-ounce can sweetened condensed milk
1/2 cup fresh Key (or regular) lime juice (from about 5 regular limes)
1/4 cup of sugar

Getting Ready:
- Center a rack in the oven and preheat the oven to 350 degrees F.
- Put the pie plate on a baking sheet lined with parchment of a silicone mat.
- Put the cream and 1 cup of the coconut in a small saucepan and bring it to a boil over medium-low heat, stirring almost constantly. Continue to cook and stir until the cream is reduced by half and the mixture is slightly thickened. Scrape the coconut cream into a bowl and set it aside while you prepare the lime filling.
- Working with a stand mixer, preferably fitted with a paddle attachment, or with a hand mixer in a large bowl beat the egg yolks at high speed until thick and pale. Reduce the mixer speed to low and beat in the condensed milk. Still on low, add half of the lime juice. When it is incorporated, add the reaming juice, again mixing until it is blended.
- Spread the coconut cream in the bottom of the graham cracker crust, and pour over the lime filling.
- Bake the pie for 12 minutes. Transfer the pie to a cooling rack and cool for 15 minutes, then freeze the pie for at least 1 hour.

To Finish the Pie with Meringue:
- Put the 4 egg whites and the sugar in a medium heavy-bottomed saucepan and heat over medium-low heat, whisking all the while, until the whites are hot to the touch.
- Transfer the whites to a stand mixer, fitted with the whisk attachment, or use a hand mixer in a large bowl, and beat the whites at high speed until they reach room temperature and hold firm peaks. Using a rubber spatula, fold the remaining 1/2 cup coconut into the meringue.
- Spread the meringue over the top of the pie, and run the pie under the broiler until the top of the meringue is golden brown. (Or, if you've got a blowtorch, you can use it to brown the meringue.)
- Return the pie to the freezer for another 30 minutes or for up to 3 hours before serving.

Sunday, May 4, 2008

Peanut Butter Torte (TWD)


This week's TWD selection comes from Elizabeth
at 
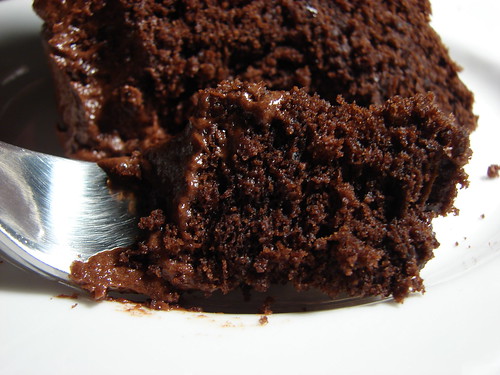
Ugg Smell Food. I will be very honest...I am not a huge fan of peanut butter desserts. Don't get me wrong, as I'm not a hater of peanut butter. I love eating PB&J sandwiches and enjoy slathering PB on apples, but I've never developed a fondness of PB cakes, pies, cookies, candy, ice cream etc (strange isn't it?). I've never tried a PB mousse, so I'm giving PB based desserts one more try.


Instead of a 9" springform pan, I used a 7" and two 4" springform pans(showing only one of the mini tortes here).


The recipe was uncomplicated and the torte came together very quickly. I made the following tweaks to the original receipe:

- increase the quantity of oreos (the recipe asked for 24 - I used 30)
- increase the amount of mini chips (the recipe called for 1/2 C - I used 1 C).
- reduced the amount of sugar in the mousse (the recipe called for 1 1/4 C - I used 1 C


For the larger torte, I didn't pull the crust all the way up the side of the pan, as I wanted to show off the decadent mousse.


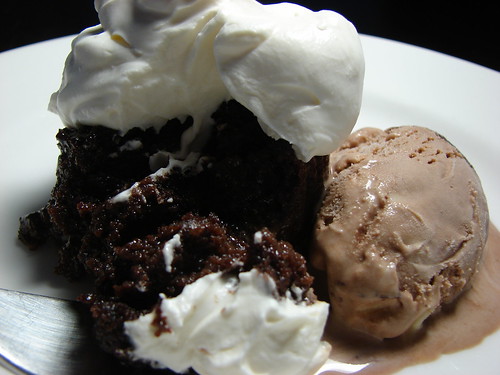
Overall, the texture of the cold fluffy mousse really helped to offset the heaviness and richness of the peanut butter. The mousse was a nice, creamy, slightly salty contrast to the sweet crunchy crust. This is a wonderful recipe, and this is definitely one to repeat for my PB lovin' friends....and for me!

Peanut Butter Torte
From Baking From My Home to Yours, By Dorie Greenspan

Ingredients
1 ¼ c. finely chopped salted peanuts (for the filling, crunch and topping)
2 teaspoons sugar
½ teaspoon instant espresso powder (or finely ground instant coffee)
¼ teaspoon ground cinnamon
Pinch of freshly grated nutmeg
½ c. mini chocolate chips (or finely chopped semi sweet chocolate)
24 Oreo cookies, finely crumbed or ground in a food processor or blender
½ stick (4 tablespoons) unsalted butter, melted and cooled
Small pinch of salt
2 ½ c. heavy cream
1 ¼ c confectioners’ sugar, sifted
12 ounces cream cheese, at room temperature
1 ½ c salted peanut butter – crunchy or smooth (not natural; I use Skippy)
2 tablespoons whole milk
4 ounces bittersweet chocolate finely chopped


Getting ready:
Center a rack in the oven and preheat the oven to 350°F. Butter a 9-inch Springform pan and place it on a baking sheet lined with parchment or a silicone mat.
Toss ½ cup of the chopped peanuts, the sugar, espresso powder, cinnamon, nutmeg and chocolate chops together in a small bowl. Set aside.
Put the Oreo crumbs, melted butter and salt in another small bowl and stir with a fork just until crumbs are moistened. Press the crumbs evenly over the bottom and up the sides of the spring form pan (they should go up about 2 inches on the sides). Freeze the crust for 10 minutes.
Bake the crust for 10 minutes, then transfer it to a rack and let it cool completely before filling.
Working with a stand mixer fitted with the whisk attachment or with a hand mixer in a large bowl, whip 2 cups of the cream until it holds medium peaks. Beat in ¼ cup of the confectioners’ sugar and whip until the cream holds medium-firm peaks. Crape the cream into a bowl and refrigerate until needed.
Wipe out (do not wash) the bowl, fit the stand mixer with the paddle attachment if you have one, or continue with the hand mixer, and beat the cream cheese with the remaining 1 cup confectioners’ sugar on medium speed until the cream cheese is satiny smooth. Beat in the peanut butter, ¼ cup of the chopped peanuts and the milk.
Using a large rubber spatula, gently stir in about one quarter of the whipped cream, just to lighten the mousse. Still working with the spatula, stir in the crunchy peanut mixture, then gingerly fold in the remaining whipped cream.
Scrape the mouse into the crust, mounding and smoothing the top. Refrigerate for at least 4 hours, or overnight; cover with plastic wrap as soon as the mousse firms.

To Finish The Torte:
Put the chopped chocolate in a heatproof bowl and set the bowl over a saucepan of simmering water. Leave the bowl over the water just until the chocolate softens and starts to melt, about 3 minutes; remove the bowl from the saucepan.
Bring the remaining ½ cup cream to a full boil. Pour the cream over the chocolate and , working with a a rubber spatula, very gently stir together until the ganache is completely blended and glossy.
Pour the ganache over the torte, smoothing it with a metal icing spatula. Scatter the remaining ½ cup peanuts over the top and chill to set the topping, about 20 minutes.
When the ganache is firm, remove the sides of the Springform pan; it’s easiest to warm the pan with a hairdryer, and then remove the sides, but you can also wrap a kitchen towel damped with hot water around the pan and leave it there for 10 seconds. Refrigerate until ready to serve.
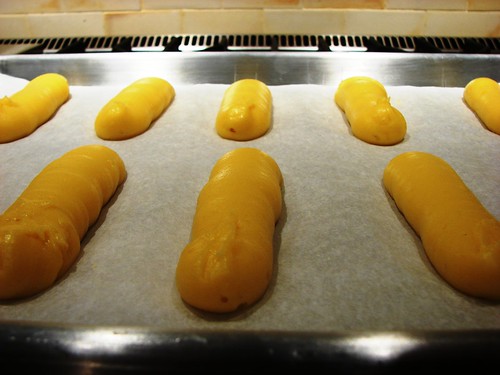
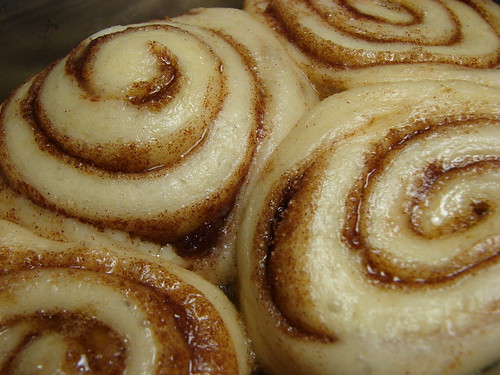
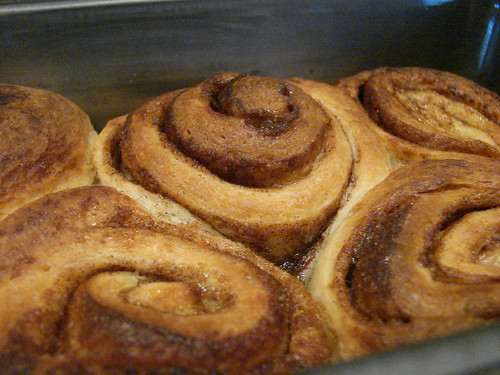
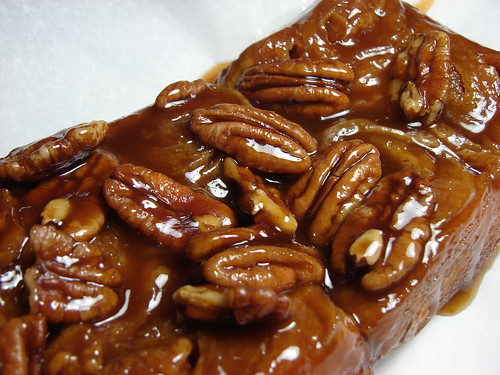
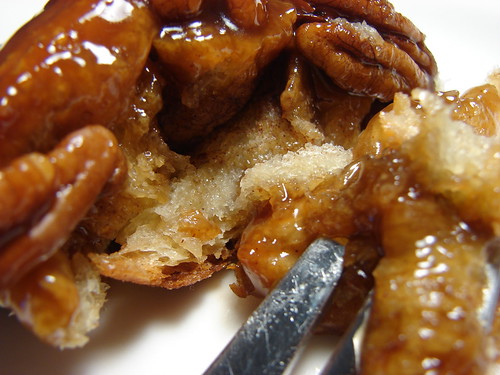
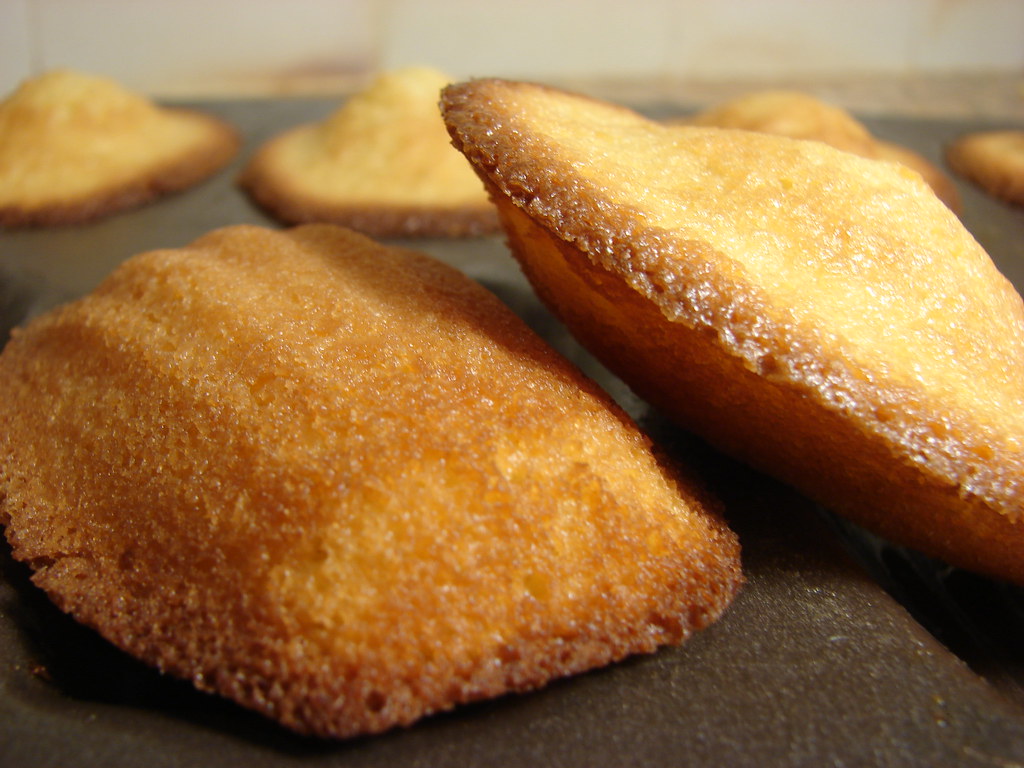
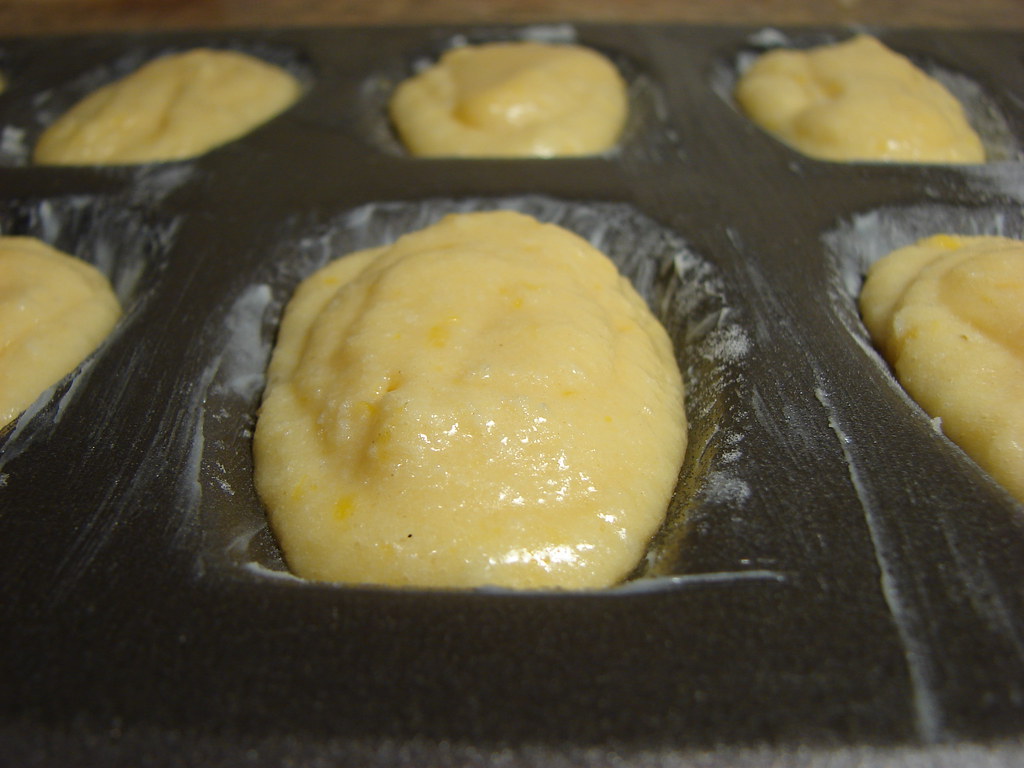
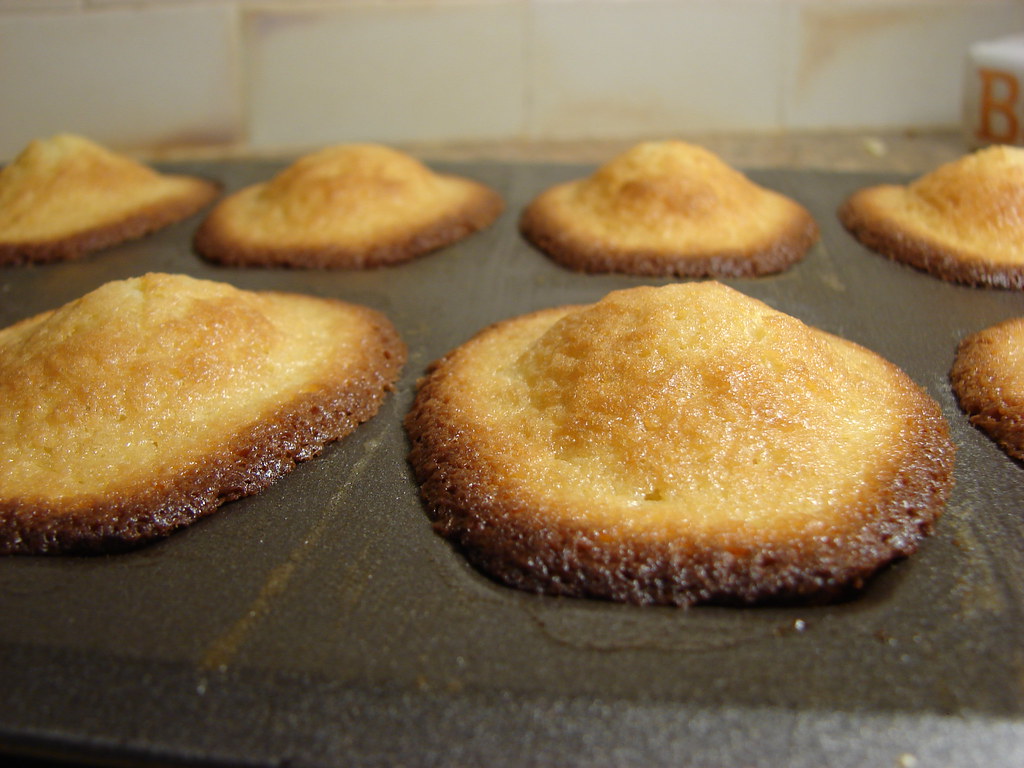
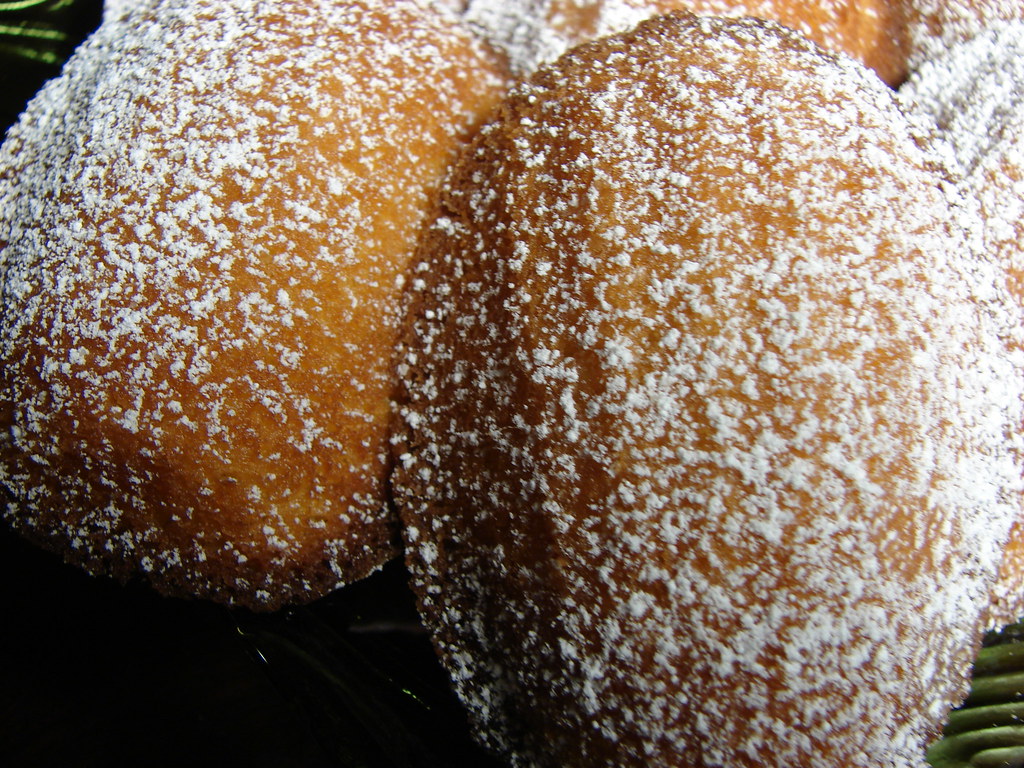
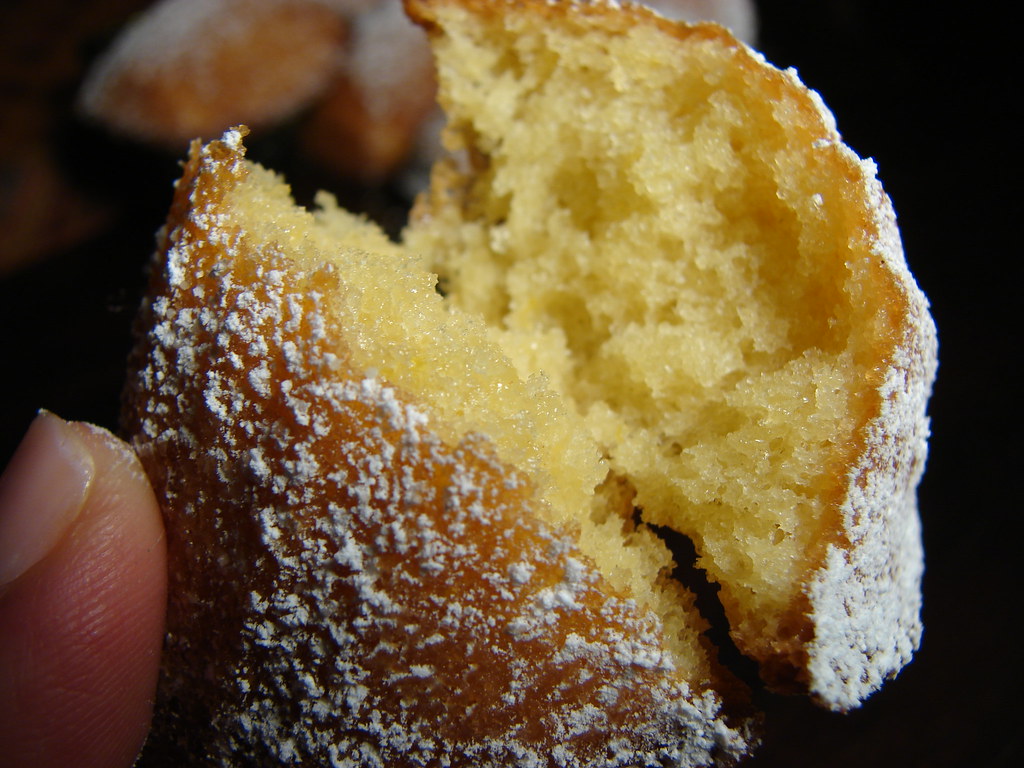
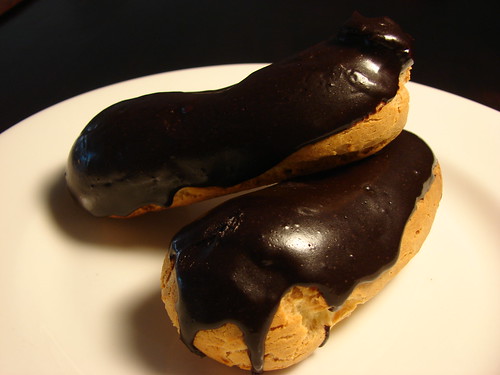
Blog Widget by LinkWithin